Overview
This guide walks you through processing a digital evidence case and analyzing the results with IPED’s GUI interface.Before proceeding, ensure IPED is installed and you have evidence to process (disk image, folder, or supported forensic format).
Basic Workflow
1
Process Evidence
Run command-line processing to index and analyze the evidence
2
Analyze Results
Open the generated case in IPED’s analysis GUI
3
Search and Filter
Use search, filters, and visualization tools to investigate
4
Tag and Export
Create bookmarks and generate reports
Processing Your First Case
Command Syntax
The basic command structure for processing evidence:-d, -data: Input data source (required, can be used multiple times)-o, -output: Output case folder (required)-profile: Processing profile (optional)
Example 1: Process a Folder
- Processes all files in
/evidence/suspect_laptop - Creates indexed case in
/cases/case001 - Uses default forensic profile
- Opens processing GUI showing progress
Example 2: Process a Disk Image
Example 3: Use Processing Profile
Processing Profiles:
forensic: Complete analysis (default) - enables all featurestriage: Quick analysis - faster, essential features onlyfastmode: Preview mode - minimal processing for quick reviewpedo: CSAM-focused - optimized for child exploitation investigationsblind: Automatic extraction - for scripted/batch processing
Example 4: Multiple Evidence Sources
Example 5: Command-Line Only (No GUI)
Understanding Processing Output
During processing, you’ll see a GUI window (unless--nogui is used) displaying:
- Items Discovered: Total files and artifacts found
- Items Processed: Number of items analyzed
- Processing Speed: MB/s throughput
- Time Remaining: Estimated completion time
- Current Task: Active processing module
Processing Tasks
IPED executes multiple analysis tasks in sequence:- Signature Analysis: Identify file types
- Hash Calculation: Compute file hashes
- Expansion: Extract archives and containers
- Parsing: Extract metadata and text
- Indexing: Build searchable index
- Carving: Recover deleted files
- Analysis: Run specialized detectors
Case Output Structure
After processing, the output folder contains:Opening the Analysis GUI
After processing completes, open the case for analysis:Analysis Interface Overview
- Search Bar (Top): Full-text and advanced search
- Filter Tree (Left): Category and metadata filters
- Results Table (Center): File listing with metadata
- Preview Pane (Right): File content viewer
- Gallery (Bottom): Image/video thumbnail gallery
- Tabs: Evidence, Bookmarks, Duplicates, Timeline, Map, Graph
Basic Search and Analysis
Full-Text Search
Search for text content across all indexed files:Filter by Category
Click categories in the left filter tree:- Documents: Office files, PDFs, text files
- Images: Photos, graphics, screenshots
- Videos: Video files and frames
- Audio: Music, recordings, voice notes
- Email: Email messages and attachments
- Chats: WhatsApp, Telegram, other messaging apps
- Databases: SQLite, MySQL dumps, etc.
- Compressed: Archives (ZIP, RAR, 7Z)
- Executables: Programs and scripts
Property Filters
Filter by metadata properties:Advanced Features
Timeline Analysis
Timeline Analysis
View files and events on a timeline: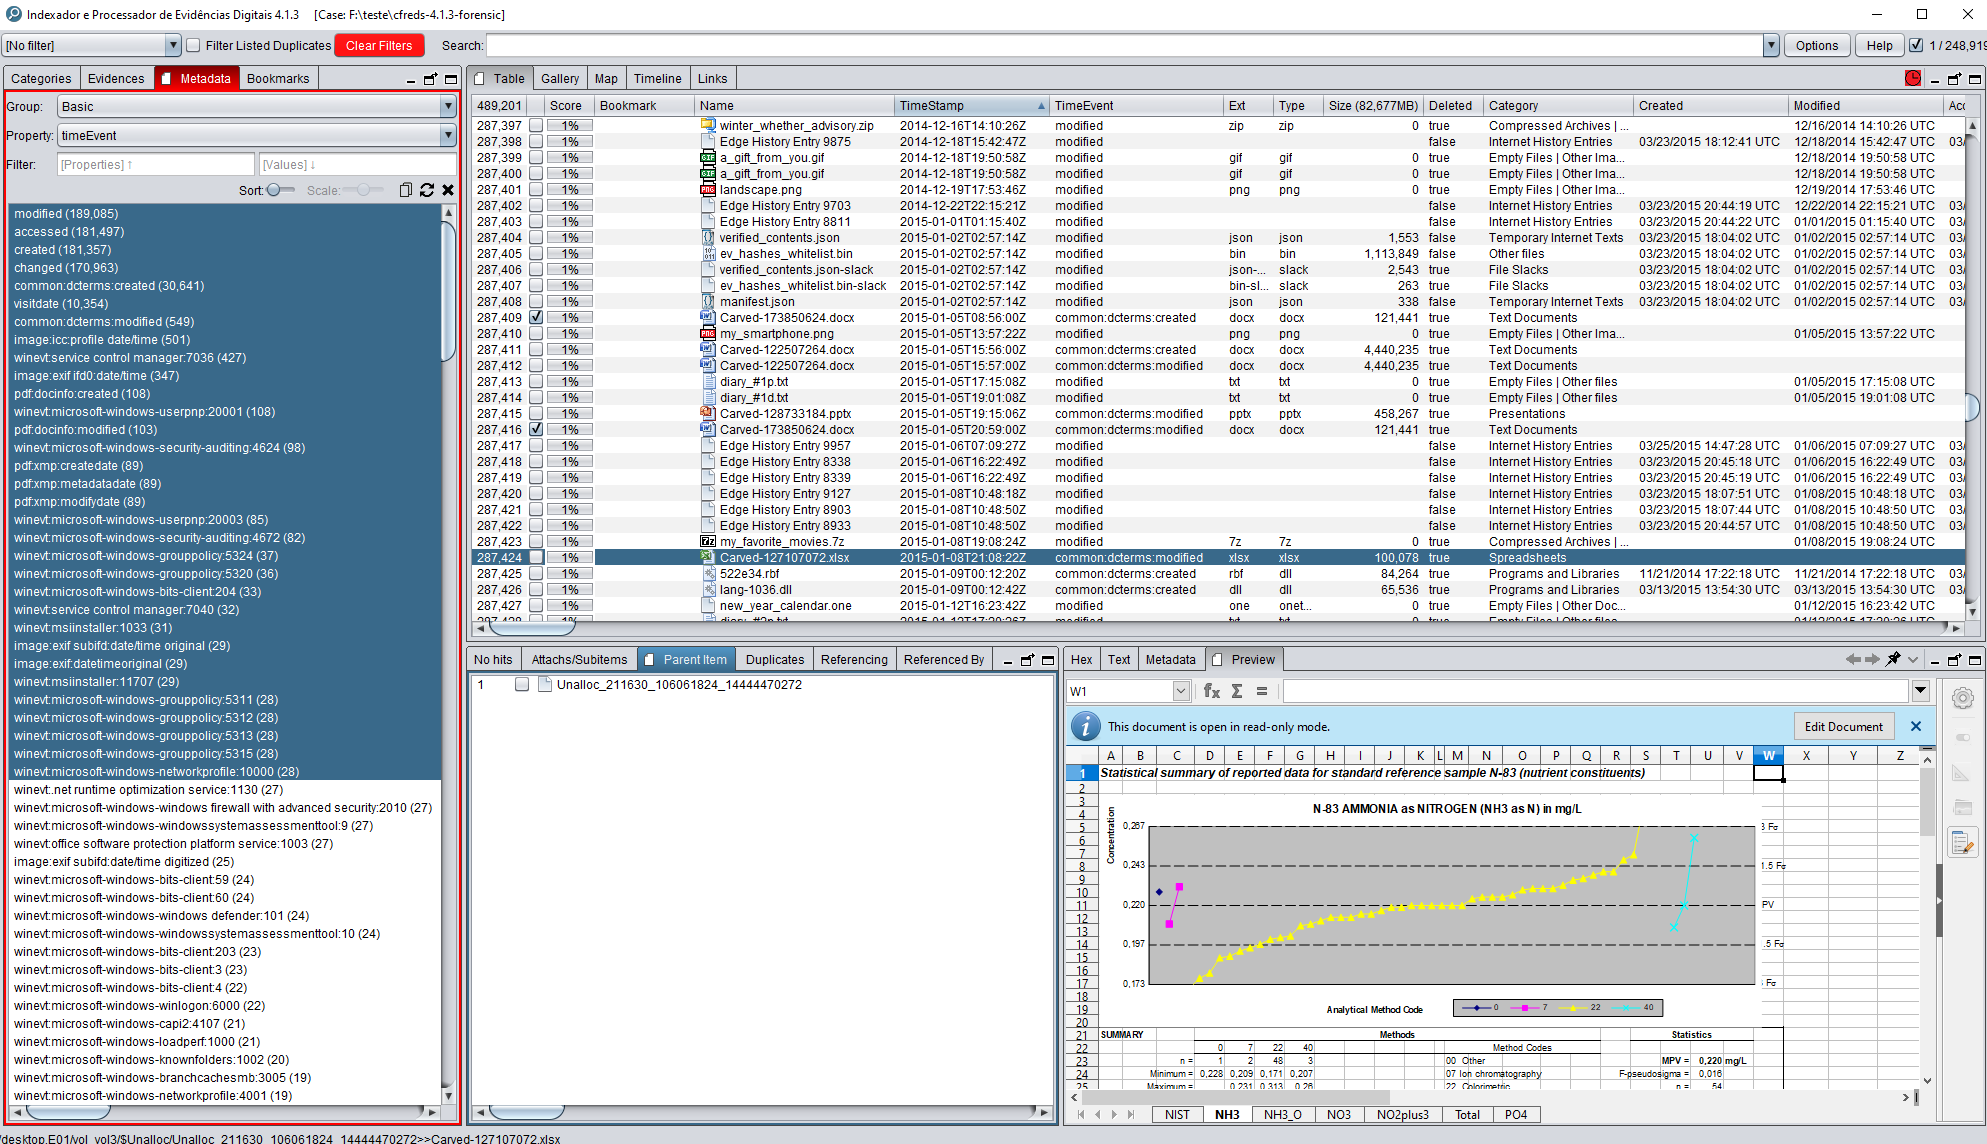
- Click Timeline tab
- Select event types (Created, Modified, Accessed)
- Use chart to filter by date range
- Analyze temporal patterns
Geolocation Mapping
Geolocation Mapping
Visualize GPS coordinates on a map: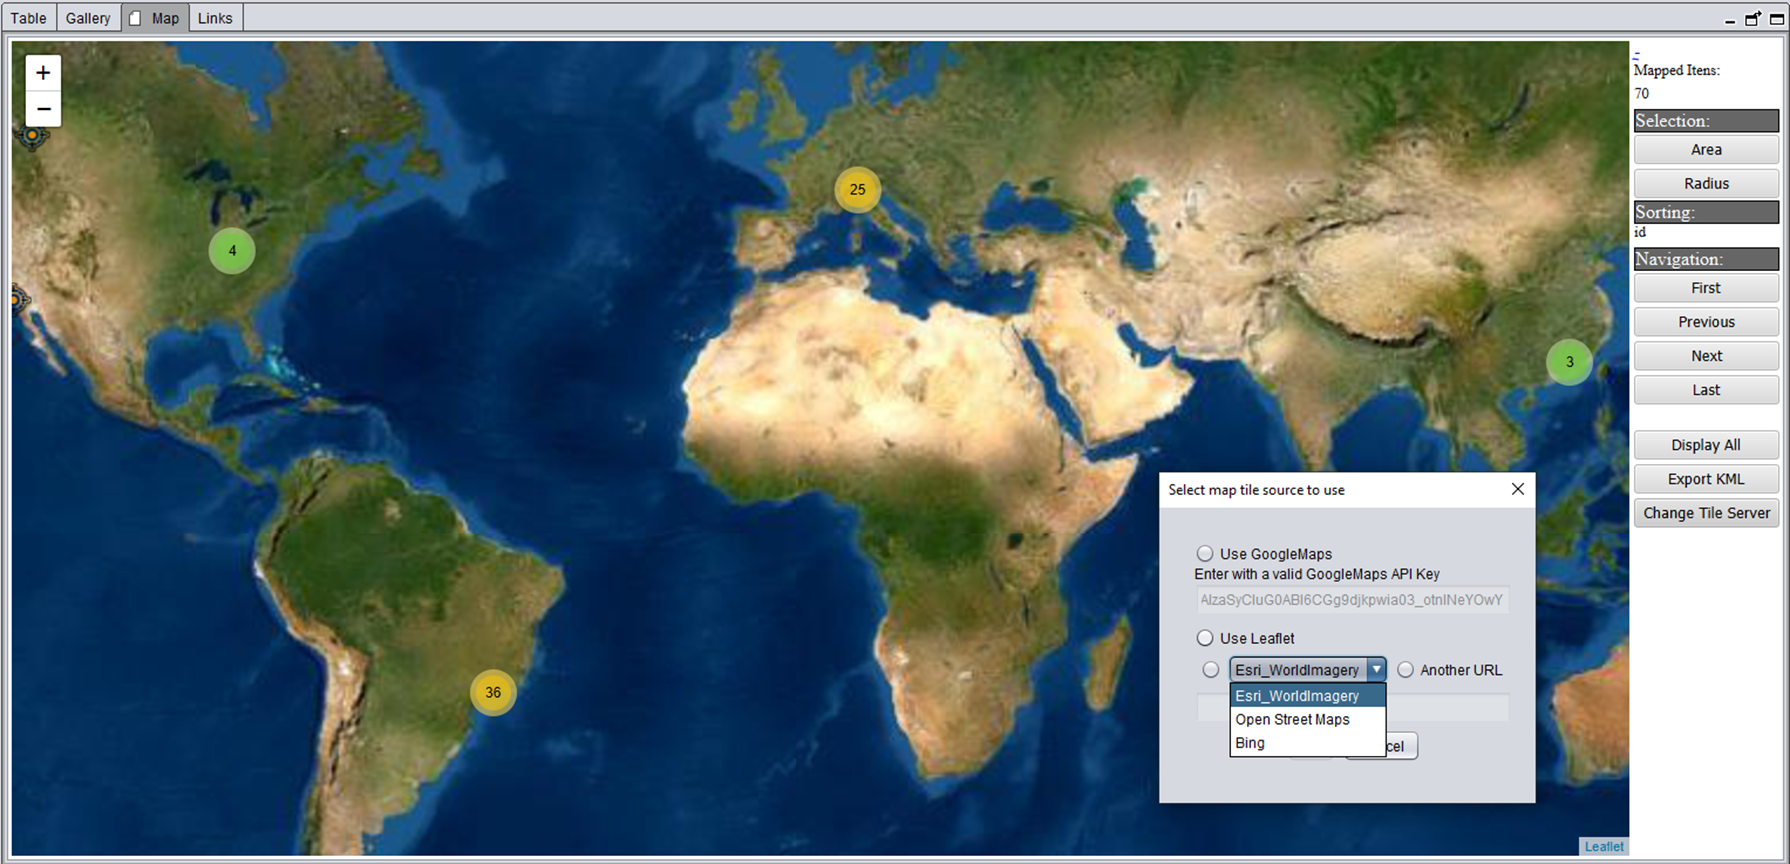
- Click Map tab
- Items with GPS data appear as markers
- Click markers to view associated files
- Useful for photos, mobile data, navigation history
Communication Graph
Communication Graph
Analyze relationships in communications: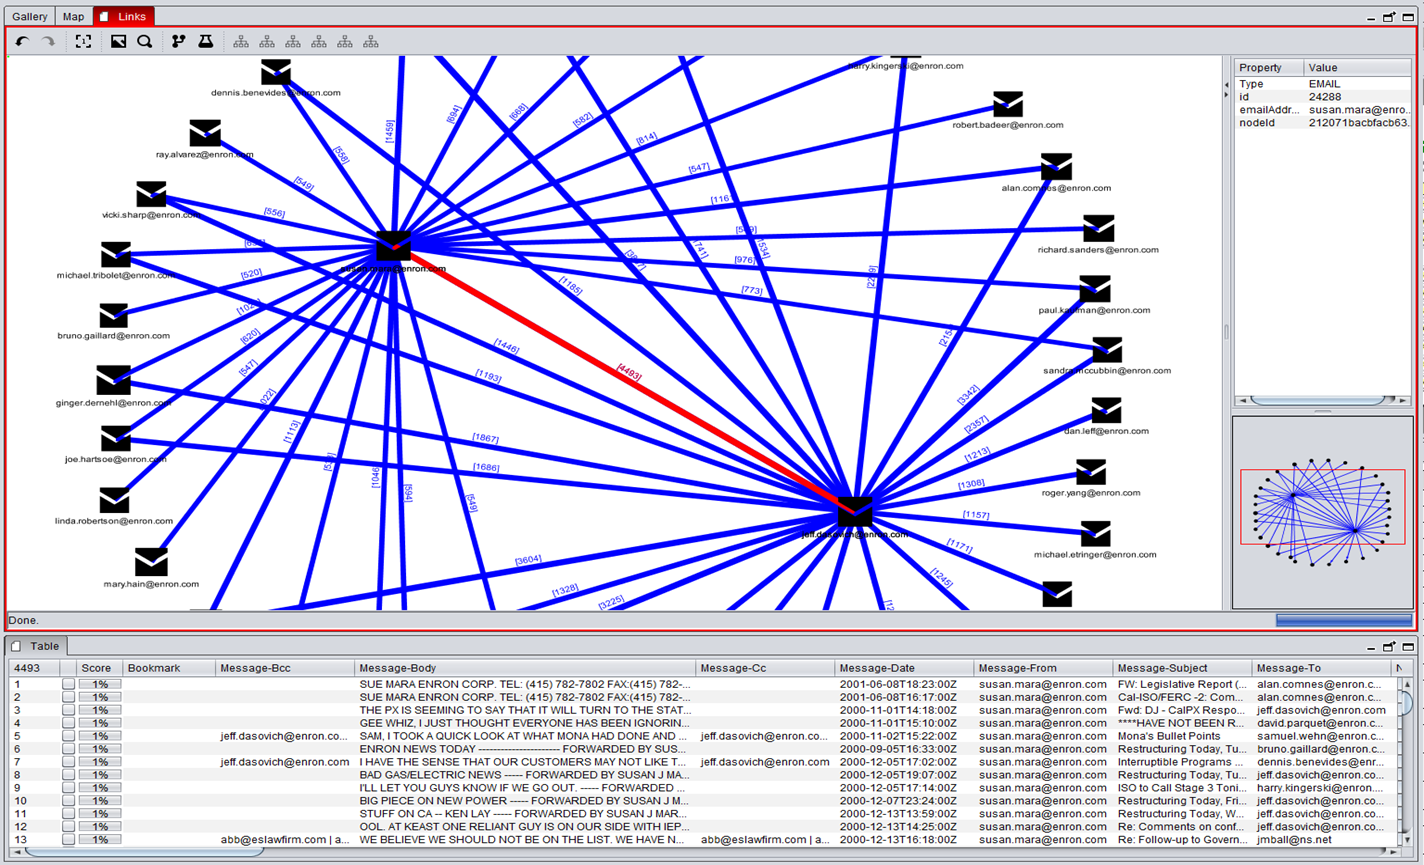
- Click Graph tab
- View connections between contacts
- Filter by communication type (calls, SMS, email)
- Identify key participants
Similar Images
Similar Images
Find visually similar images:
- Right-click an image
- Select “Similar Images”
- Adjust similarity threshold
- Review matches
Duplicate Detection
Duplicate Detection
Find duplicate files by hash:
- Click Duplicates tab
- View files grouped by hash
- Identify redundant data
- Useful for deduplication
Creating Bookmarks
Tag items of interest for reporting:1
Select Items
Check boxes next to relevant files in the results table
2
Create Bookmark
Right-click → “Add to Bookmark” → Enter bookmark name
3
View Bookmarks
Click Bookmarks tab to see all tagged items organized by bookmark
- CTRL + Click: Multi-select items
- SHIFT + Click: Select range
- CTRL + A: Select all visible items
- Space: Toggle selection
Generating Reports
Export findings to HTML report:1
Tag Items for Export
Create bookmarks with items to include in report
2
Generate Report
File → Generate Report → Select bookmark(s) → Choose output folder
3
Report Contents
The report includes:
- HTML pages with file listings
- Thumbnails and previews
- Extracted file copies (optional)
- Metadata CSV files
- Portable viewer (optional)
Advanced Processing Options
Encryption and Passwords
Timezone Configuration
Continue/Restart Processing
Append to Existing Case
Portable Cases
Configuration Files
Customize processing behavior by editing files inconf/ folder:
IPEDConfig.txt
Main configuration file:Processing Profiles
Profiles are located inconf/profiles/:
Performance Tips
Use SSD Storage
Process cases on SSD drives for 3-5x speed improvement
Adjust Thread Count
Set
numThreads in LocalConfig.txt to match CPU coresIncrease Memory
Set
maxJavaMemory for large cases (16GB+ for 1TB+ evidence)Disable Unused Features
Turn off OCR, carving, or transcription if not needed
Memory Configuration
Editconf/LocalConfig.txt:
Common Use Cases
- Mobile Device Analysis
- Email Investigation
- Internet Activity
- Disk Image Analysis
- WhatsApp chat parsing
- Telegram message extraction
- Browser history
- GPS location mapping
- Contact and call log analysis
Getting Help
Command-Line Help
-d, -data: Input data source-o, -output: Output folder-profile: Processing profile-p, -password: Passwords for encrypted sources-tz, -timezone: Timezone for FAT devices--append: Add to existing case--continue: Resume processing--restart: Restart from beginning--nogui: No GUI mode--portable: Portable case- And more…
Documentation and Resources
User Manual
Comprehensive user guide on GitHub Wiki
Beginner's Guide
Step-by-step introduction for new users
Troubleshooting
Common issues and solutions
GitHub Issues
Report bugs and request features
Next Steps
Now that you’ve processed your first case, explore advanced features:- OCR: Enable optical character recognition for scanned documents
- Audio Transcription: Automatically transcribe audio files
- Face Recognition: Detect and search for faces in images
- Custom Parsers: Add support for new file formats
- Python Scripting: Extend IPED with custom analysis scripts
- Distributed Processing: Use ElasticSearch and MinIO for large-scale cases